List
Detailed, row-based view of requests with customizable columns for comprehensive review.
Overview
The List View provides a detailed, row-based view of all your requests. Unlike board layouts, the list view displays requests in a linear, tabular format with customizable columns, making it ideal for reviewing detailed information across multiple requests simultaneously.
List View is perfect for detailed review work, comparing requests side-by-side, and working with large numbers of items that need individual attention.
When to Use List View
Detailed review
When you need to see multiple property columns for each request at once.
Bulk operations
For selecting multiple requests and performing batch actions.
Data comparison
When comparing request properties like due dates, priorities, or assignees.
Large datasets
Working with many requests where a tabular format is easier to scan.
Finding and Filtering
List View works with Agentive's powerful search and filter tools:
Search
Quickly find specific requests by name, ID, or keywords.
Filters
Apply advanced filtering by status, priority, category, and more.
Display Options
Customize grouping, sorting, and visible columns.
Request Structure

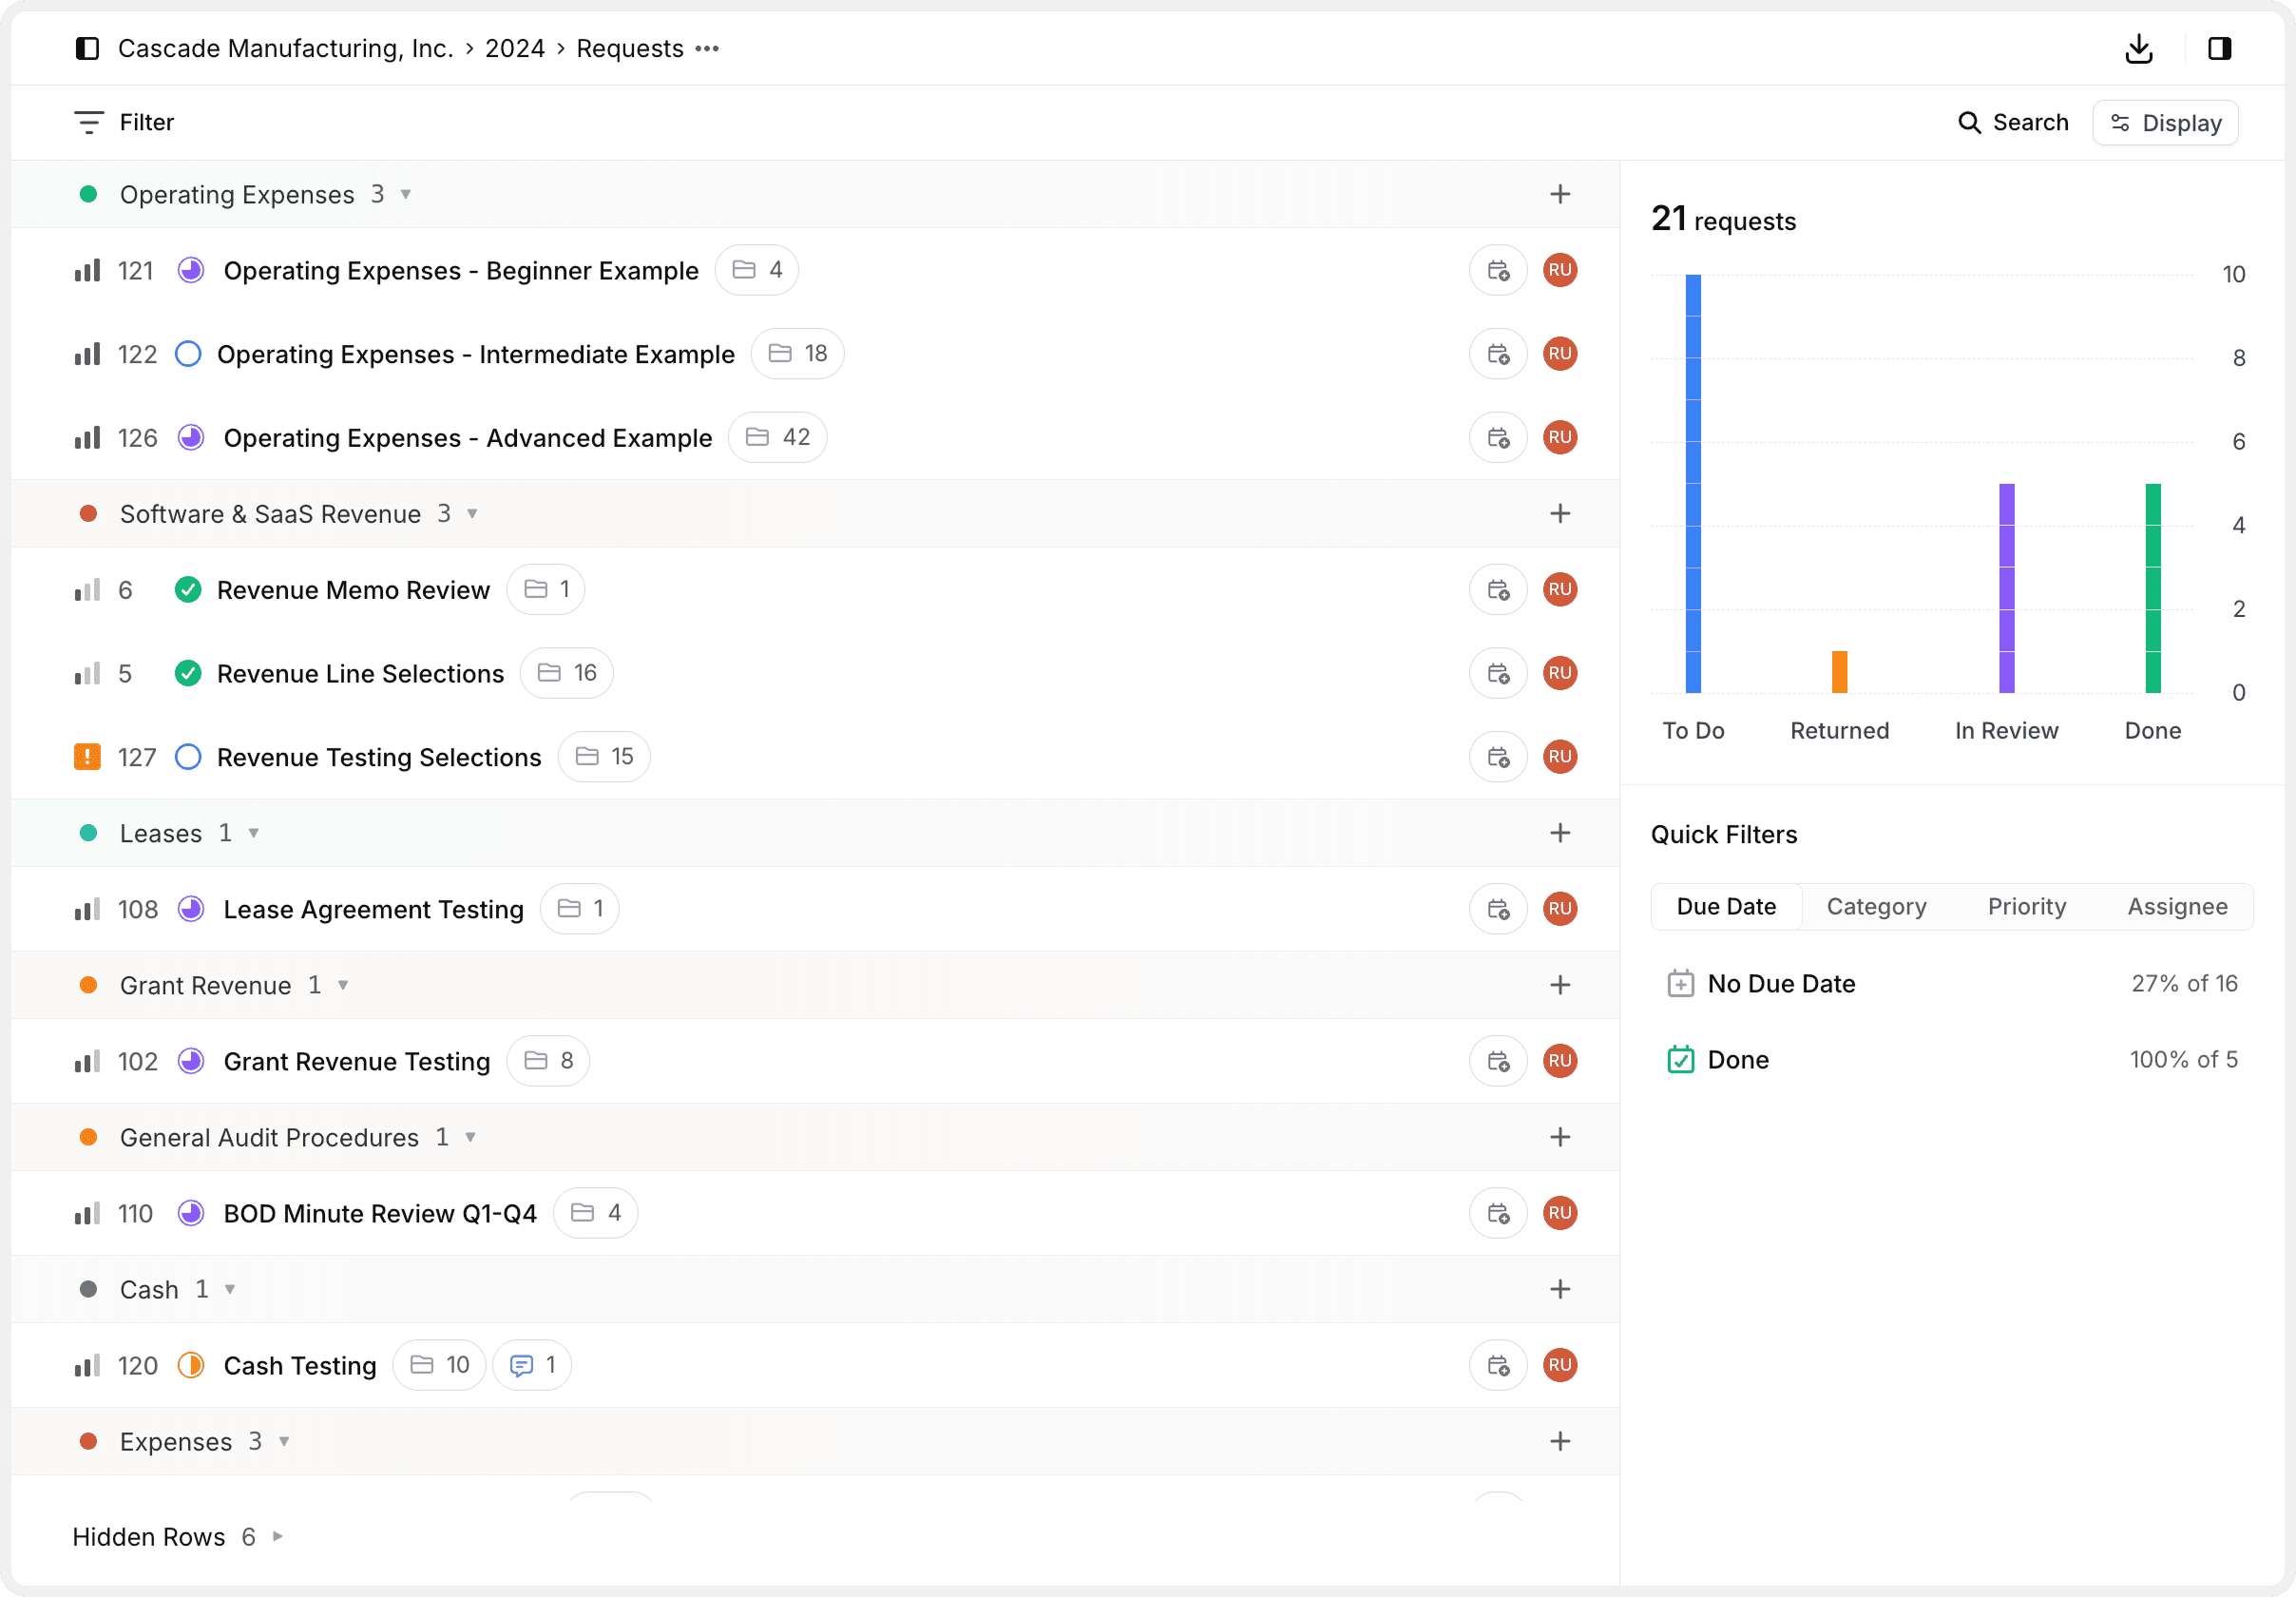
Requests are displayed as rows organized within collapsible category groups. Each group provides:
- Category name — The audit area or project name
- Request count — Number of requests in the group (e.g., "Software & SaaS Revenue 3")
- Collapse/expand toggle — Arrow icon to show or hide requests in the group
- Add button — Plus icon (+) to create new requests within the category
Request Row Information
Each request row displays comprehensive information:
| Element | Description | Location |
|---|---|---|
| Status icon | Color-coded circle indicating workflow stage | Far left |
| Request ID | Unique numeric identifier (e.g., 5, 6, 127) | Left side |
| Title | Full request name | Main area |
| Comment count | Envelope icon with number of comments | Right of title |
| File count | Number indicating attached files | Right of title |
| Due date | Target completion date with calendar icon | Right side |
| Assignee | Team member avatar | Far right |
The specific columns shown depend on your Display Options settings. Customize which properties appear using the Display panel.
Working with Categories
Expanding and Collapsing
Click the arrow icon
Click the dropdown arrow next to a category name to expand or collapse the group.
Collapsed view
Collapsed categories show only the category header with the request count. Use this to hide categories you're not currently working on.
Expanded view
Expanded categories display all requests in that category as individual rows with full details.
Collapse categories you're not actively working on to reduce clutter and focus on relevant requests.
Creating Requests Within Categories
Click the + button on the right side of any category header to create a new request within that specific category.
Benefits:
- The new request automatically inherits the category
- Keeps related requests organized
- Faster than creating a request and assigning category manually
Request Rows in Detail
Status Indicators
Request rows display visual status indicators:
Red circle
Backlog — Not yet started or prioritized.
Blue circle (empty)
To Do — Ready to be worked on.
Green checkmark
Done — Completed and approved.
Orange exclamation
Priority indicator — Urgent or high-priority request.
Interactive Elements
Each row is fully interactive:
- Click the row to open the request detail panel
- Hover over icons to see tooltip details
- Click assignee avatar to view team member information
- Click comment/file icons to jump to those sections in the detail view
Selecting Requests
List View supports powerful multi-select capabilities for bulk actions:
Single selection
Click on a request row to select it. The row highlights to indicate selection.
Multiple selection
- Cmd+Click (Mac) or Ctrl+Click (Windows) to select multiple individual requests
- Shift+Click to select a range of requests
Keyboard navigation
Use arrow keys (↑↓) to move between requests. Press Enter to open the selected request.
Perform bulk actions
With multiple requests selected, use toolbar actions to update status, assignee, priority, or other properties at once.
The selection count appears in the toolbar when requests are selected (e.g., "3 selected"). Click outside the list to deselect all.
Quick Filter Tabs
Located below the main toolbar, quick filter tabs provide instant filtering without opening the Filter menu:
Due Date
Shows breakdown by Overdue, No Due Date, and Done with percentage indicators.
Category
Lists all categories with request counts for one-click filtering.
Priority
Filters by Urgent, High, Medium, or Low priority levels.
Assignee
Groups by team member with assignment counts.
Quick filter tabs update dynamically based on your current filters and search. Use them for fast, contextual filtering.
Hidden Rows
At the bottom of the list, a Hidden Rows section indicates how many requests are currently hidden:
Requests can be hidden due to:
- Active filters that exclude them
- Display settings (e.g., "Hide done requests")
- Manual hiding by the user
Managing hidden rows:
View hidden count
Look for "Hidden Rows X" at the bottom of the list, where X is the number of hidden requests.
Expand hidden rows
Click the Hidden Rows section to expand and see which requests are hidden.
Unhide requests
Click specific requests to unhide them individually, or click "Show all" to reveal all hidden requests at once.
If you're not seeing expected requests, check the Hidden Rows section. They may be hidden by filters or display settings.
Column Customization
List View's power comes from customizable columns. Control which properties appear as columns using Display Options.
Available columns:
| Column | Best For |
|---|---|
| Priority | Identifying urgent work at a glance |
| ID | Reference and tracking in reports |
| Status | Seeing workflow progression |
| Due date | Managing deadlines and overdue items |
| Category | Understanding functional organization |
| Files | Finding requests with/without documentation |
| Assignee | Tracking team member workloads |
| Created | Understanding request age |
| Updated | Seeing recent activity |
Show only the columns you need for your current task. Too many columns make the list harder to scan, while too few may hide important context.
List View Tips
Switching to Other Views
List View works alongside Board and Activity views:
Board View
Switch to Kanban-style board for visual workflow management with drag-and-drop.
Activity View
View a timeline of request changes and updates for tracking progress.
Your filters, search, and grouping settings persist when switching between views, maintaining your context.
Common List View Workflows
| Workflow | Configuration |
|---|---|
| Daily work review | Group by Status, Show Priority + Due Date columns, Hide done requests |
| Team coordination | Group by Assignee, Show Status + Due Date columns, Show all requests |
| Deadline management | Group by Due Date, Sort by Priority, Show Priority + Assignee columns |
| Category audit | Group by Category, Manual ordering, Show Status + Files + Due Date columns |
| Overdue focus | Filter by Overdue, Group by Priority, Show Assignee + Category columns |
These are starting points. Customize your view based on your specific audit workflow and team preferences.
How is this guide?